Redistribute Disk Space (Resize Partition) with Partition Wizard Freeware
This article is a live tutorial that shows you how to resize partition without data loss with a freeware called Partition Wizard Home Edition. There are many occasions that you might need to resize a partition or redistribute disk space like your system c is running out of space; or there is large space on your disk to be redistributed (eg. Windows 7 installed, xp removed) ...
Why Partition Wizard Home Edition
It was the first partition software announces (freeware) Windows 7 supported. Besides Windows 7 supported, it is a partition manager that is free to support Windows 64bit OS and along with many other useful features. It can manage partition including Move/Resize Partition, Copy Partition, Create Partition, Delete Partition, Format Partition, Convert File System, Hide/Unhide Partition, Explore Partition, Partition Recovery and much more.
Tips: to resize partition in Windows Server Systems, be free to follow this tutorial: resize server partition
Step by step instructions to use Partition Wizard Home
This is a tutorial to redistribute disk space from one partition to another. It is pretty useful if you encounter any of the following situation:
- system c (boot partition) is running out of space
- there are some other space that are available for redistribution like d or e drive is large
- resize partition but do not want to reload OS nor lose current data on the partition
- resize RAID (all levels built by hardware or RAID card) partition
- Windows OS (PC plantform) installed and want to redistribut disk space, for resizing any Windows server partition, please visit tutorial: resize server partition
Here we made an example of extending c partition by using the free space shrinked from other large partition, say drive e:. Tips: it is same way if you want to redistribute disk space among partitions. The layout of current partition arrangement is as following

And here are steps to resize c partition by shrining space from other partition e. In the very first, we need to download free copy of freeware Partition Wizard Home Edition. Install it on any partition you like and run it from your desktop icon.
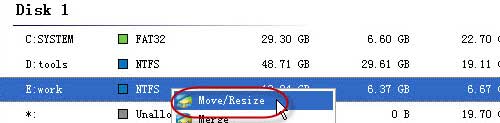
- Shrink e: by right clicking e and click "Move/Resize" and then shrink e to make free space -
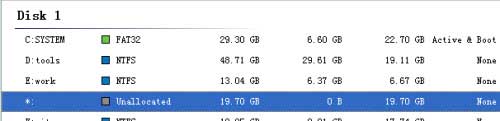
unallocated space
Resize e by right clicking and you will see the option "Move/Resize", when the mouse became a sign of two arrows, then you can move to the left, that is shrinking.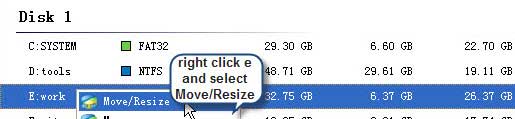
And here is a photo presenting the shrinked E.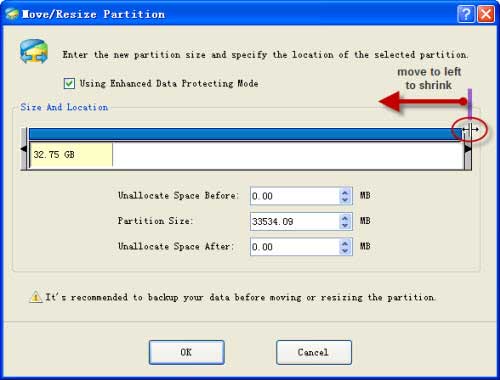
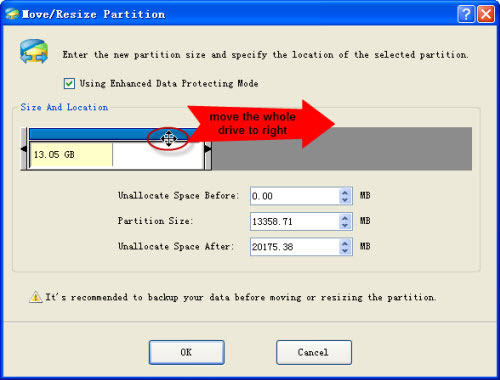
Unallocated space was produced, then the next job is to move the unallocated space next to c. c drive can be extended only when there is unallocated space next to its side.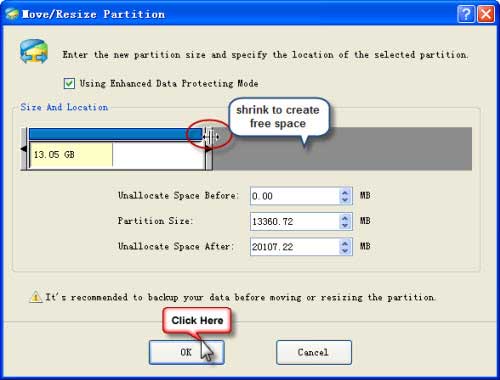
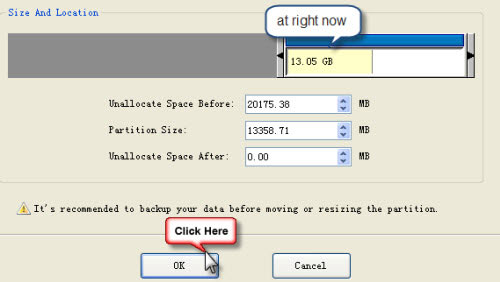
- Move e to make the unallocated space close to its target - partition c
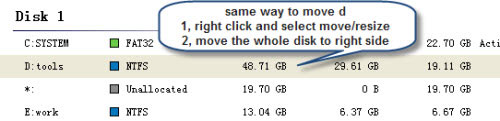
- Move d to make the space closer to c drive
- Right click c drive to enlarge by "Move/Resize" and then extend it with the unallocated space gathered from e drive
- Confirm all the operations

Tips: if there is any file/program opened in any mentioned partition above, then the program will report the partition is been used, please close the file/program to try again.
![]() Download and install Partition
Wizard Home Edition
Download and install Partition
Wizard Home Edition
when there is already a lot of unallocated space. (if there is no unallocated space, you need to shrink other big partition on the same disk. Or you may delete some unnessary partition to make free disk space available)
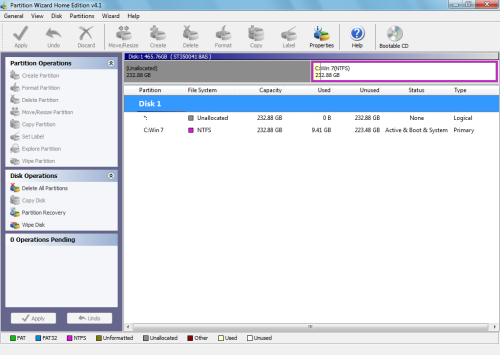
- Download and install Partition Wizard Home Edition, in fact redistributing the unallocated space back to drive C is easy. Once you launch Partition Wizard, you’ll see your partition in a nicely organized user interface, as shown in the picture. As you can see on this example system, I have a 500GB hard disk that is configured as two 233GB partitions, and the first partition is unallocated and the second partition contains Windows 7.
- To begin, right-click on the Windows 7 partition and select the Move/Resize command, as shown in the following picture.
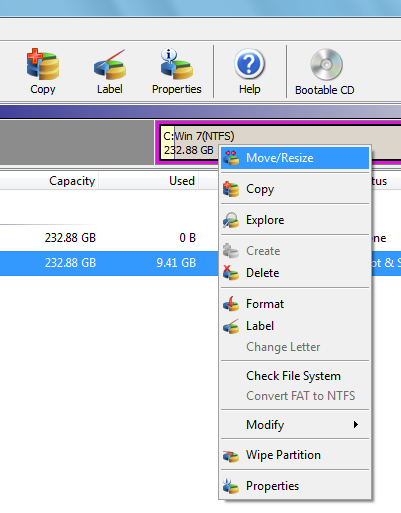
- Select the Move/Resize command on the Windows 7 partition.
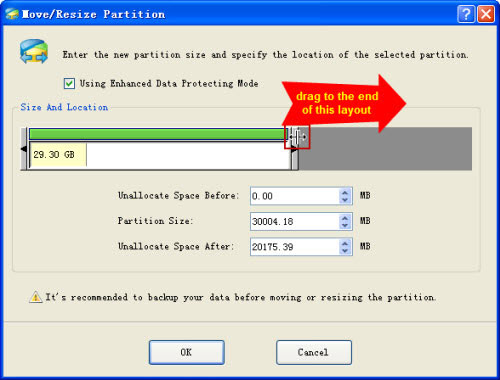
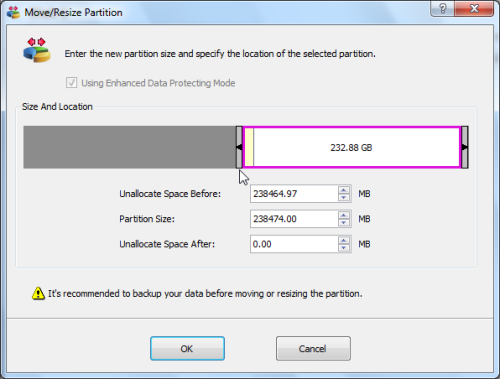
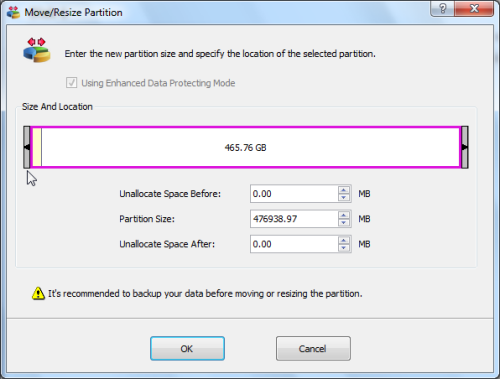
As soon as you do, you’ll see the Move/Resize Partition dialog box, shown in Figure C, where you can resize the partition either by typing the appropriate numbers in the text boxes or by simply selecting the marker at the beginning of the partition and dragging it all the way to the left.
-
You can resize the partition by dragging the marker all the way to the left.
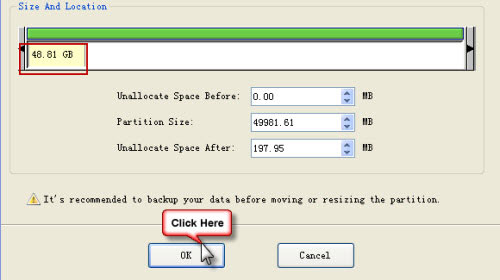
- Once you drag the marker all the way to the left, you’ll see that the partition now occupies the full hard disk, as shown in Figure D. To continue, click OK, and you’ll return to the main Partition Wizard window.
-
The partition is now staged to occupy the full hard disk.
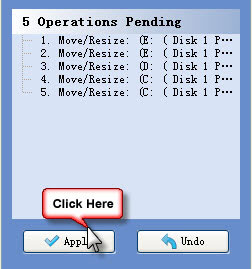
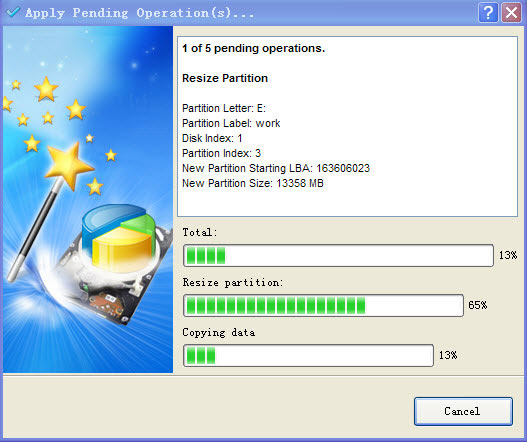
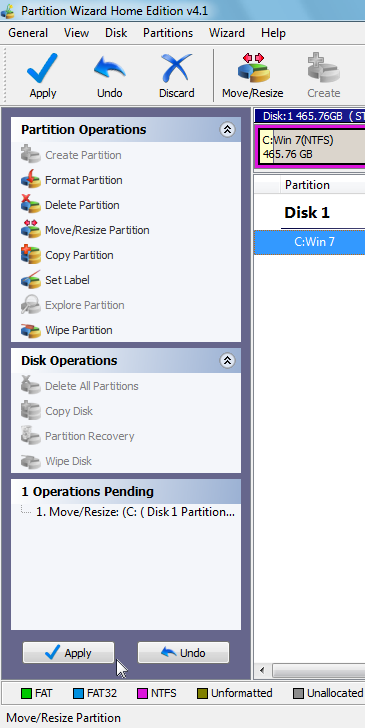
- To initiate the Move/Resize Partition, you can click the Apply button below the Operations Pending panel, as shown in Figure E.
-
Click the Apply button below the Operations Pending panel to initiate the Move/Resize Partition operation.
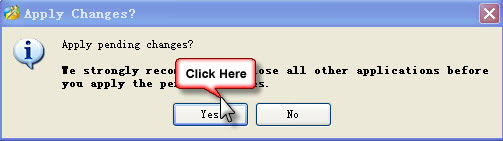
- When you do, Partition Wizard will recognize that the partition that you are resizing is the current partition and will display an error message that will also prompt you to restart the system, as shown in Figure F.
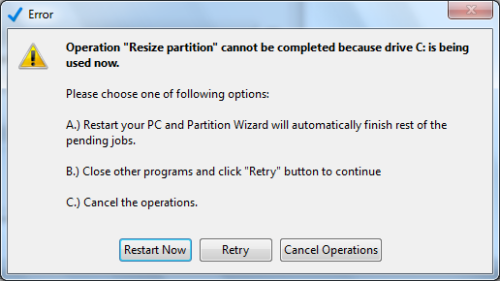
Partition Wizard will prompt you to restart the system so that it can perform the Move/Resize Partition operation.
After you click the Restart Now button, your system will restart and boot into a Partition Wizard environment, which will carry out the resizing operation. When it is finished, it will restart your system again and then Windows 7 will boot normally.
Tips: usually you won't have to restart your computer after resizing partition. The reason why this tutorial asked you to restart PC is because the free unallocated space is on the left side of the boot partition. (if the free space is on the right side, it won't ask you to restart PC. If you are resizing other non system partition, you won't have to restart PC at all no matter where the free space is)
![]() Free Download Partition Wizard
Free
Free Download Partition Wizard
Free
Related products
- Partition Wizard Home Edition
- Acronis Disk Director Server
- Resize partition with partition magic
- Partition Manager Server
- Resize server Partition Wizard Server
Related articles
- Server 2003 out of space
- windows 2003 low disk space
- server c drive out of space
- low disk space sbs 2003
- Capture unallocated space Windows 7
- Extend C drive
- free partition magic
- merge partition extend c drive
- Resize vmware partition
- shrink c create partition
- Disk partitioning
- Best partition Software
- Paragon Partition Manager Server
- Partion Magic
- Partition Magic